Introduction
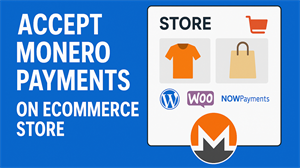
Want to accept Monero payments on your own ecommerce site? Well, if you watch this video, I'll show you how I did it. All you're going to need is some Monero in your wallet and to sign up for web hosting and payment processing.
Get Hosting and Pay with Monero
First, go to monerica.com and then under web hosting and cloud and web hosting providers, select Server Guru. Click through to their website and you'll see all the different services that they offer. The reason I'm selecting them is they have anonymous web hosting where you can get a one-click install of WordPress and pay in Monero.
For this example, I'm going to buy one month of hosting. Simply click to order and provide your email address, then select that you'd like to pay with Monero. You'll be presented with an invoice. Select that you'd like to pay with XMR for Monero. Copy the amount and wallet address and send the transaction.
Once a transaction has been detected, it will say that the invoice has been paid. Sign into your account with the email you provided and you'll see that the order is pending. Wait until 10 confirmations have passed, which is about 20 minutes. And then you'll see that your order has been completed.
Access Hosting Panel & Install WordPress
Go into your web hosting. Click to manage and manage your web hosting. From here, sign in with your account. If you don't know your username or password, you can recover it here. Once you're in your dashboard, you'll see a button for WordPress. Click that button and then you can click to install WordPress. Here you can see WordPress installing.
After it's been installed, it's recommended to upgrade your PHP version to the latest version. So that's what I'm doing here.
Install Required Plugins
After that, I can go to select plugins and search for the NOWPayments plugin. Install that plugin so that you can accept Monero payments and then install the WooCommerce plugin so that you can have an e-commerce shop and the settings for your WordPress.
Click to permalinks then select post name and save. This can help with some URLs later.
Connect NOWPayments
Next, go to WooCommerce and payments and you'll see the NOWPayments plugin. There's another video on this channel which is in the description which shows how to sign up for NOWPayments. Click the affiliate link in the description below to sign up for NOWPayments. You'll need an account there so you can get information required by the plugin.
Once you're in your NOWPayments account, you'll want to copy the API key and your IPN secret key. You'll want to save these somewhere secure, and you may need to regenerate the code if you don't have it already.
Configure Plugin Settings
With this information, go back into your WooCommerce settings for NOWPayments and click to manage. Paste in your API key and your IPN secret key. In the settings for NOWPayments, you'll want to enter the web hook URL, which you can find in the settings in WooCommerce. This will allow the communication between NOWPayments and your application that will update the status of the payment in WooCommerce. Save your changes.
Add a Test Product & Checkout
Now from here I will go to add a product for a Mona t-shirt. I will give it a name and add an image. Going to the perma link for the product that I just created. I can see an image and name and price. On this page, I can add the product to cart.
Here you can see viewing the cart and then the checkout. You'll see that the payment option includes NOWPayments. After entering in some address information, I can click to place order. Placing an order will redirect me to NOWPayments with the price of the product passed over to it.
You can also see in the Woo Commerce orders dashboard that an order has been created and it's pending payment. This shows that you now have an e-commerce application that can sell a product for Monero.
Quick Recap
- Sign up for Servers Guru.
- Get a web hosting plan that allows for WordPress.
- Install WooCommerce and NOWPayments plugins.
- Sign up for NOWPayments.
- Paste in the configuration and the NOWPayments plugin.
- Copy the web hook URL from your WooCommerce application's NOWPayments and save that in NOWPayments.
Notes & Next Steps
This video was just focused on creating your web hosting and connecting it to NOWPayments. If you'd like to add a custom domain or other features, you can do that through Servers Guru.
Disclaimer
This video is for educational purposes only. It's not tax, legal, or financial advice.
Wrap Up
After setting up your web hosting and connecting to NOWPayments, you are able to start your own Monero accepting business with very little effort or expense. If this helped you, hit like, share, and subscribe to help support the Monero circular economy. For more ways to live your life using Monero, visit monerica.com.


